Melting chocolate may seem like a simple task — just heat it up, right? But ask anyone who’s ended up with a grainy, seized, or scorched mess, and they’ll tell you: chocolate is delicate and requires gentle handling.
In this guide, you’ll learn how to melt chocolate properly using two foolproof methods, plus tips to avoid the most common mistakes. Whether you’re baking, drizzling, or dipping, mastering the chocolate-melting process will elevate your homemade sweets to another level.
Why Chocolate Is So Easy to Ruin
Chocolate contains cocoa solids, cocoa butter, and sugar, all of which can react badly to too much heat or moisture. Here’s what can go wrong:
- Burning: Chocolate scorches easily and becomes bitter or dry.
- Seizing: A tiny drop of water causes chocolate to clump and become grainy.
- Overheating: This breaks the emulsion and ruins the smooth texture.
The key to melting chocolate successfully is gentle, indirect heat and patience.
Types of Chocolate and How They Melt
Not all chocolate melts the same way. Here’s a quick breakdown:
- Dark Chocolate: Melts easily and evenly due to higher cocoa content.
- Milk Chocolate: Contains milk solids and sugar — burns more easily.
- White Chocolate: Very heat-sensitive — melts at a lower temperature.
- Chocolate Chips: Formulated to hold shape — harder to melt smoothly. Use baking chocolate for better results.
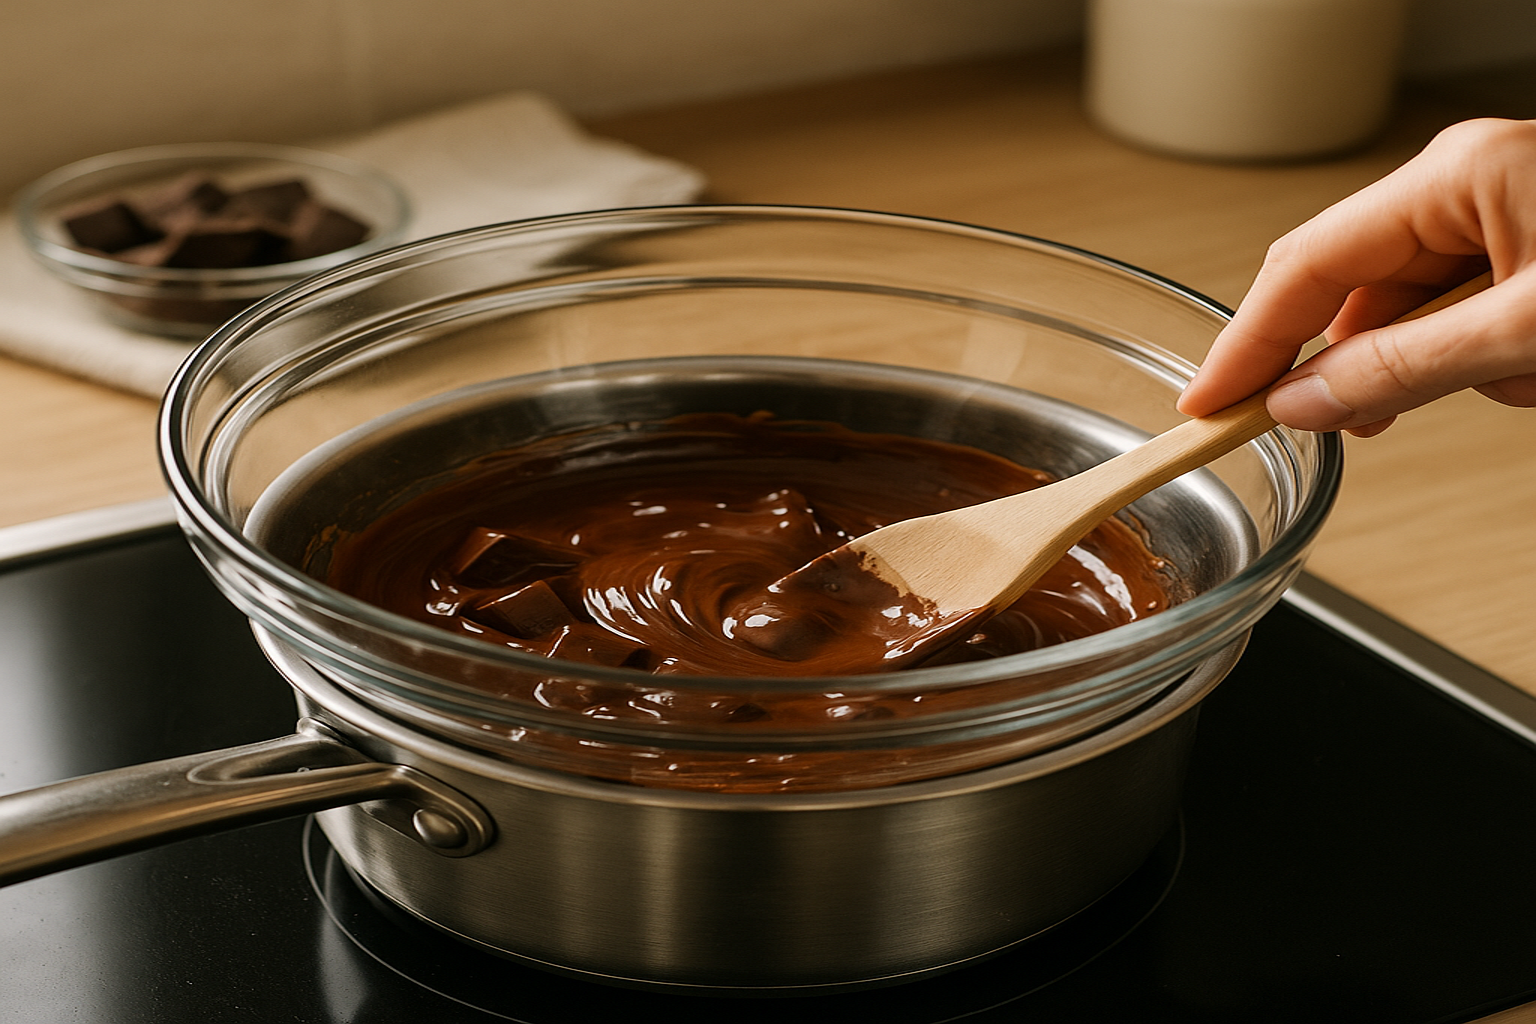
Method 1: Double Boiler (Bain-Marie)
This is the most reliable way to melt chocolate without burning.
You’ll Need:
- Heatproof bowl
- Saucepan
- Chocolate, chopped or in chips
Instructions:
- Fill a saucepan with 2 inches of water and bring it to a gentle simmer.
- Place a heatproof bowl on top, making sure the bottom doesn’t touch the water.
- Add chopped chocolate to the bowl.
- Stir gently and continuously as it melts.
- Remove from heat once smooth and glossy.
✅ Best for: Large amounts, baking, dipping, or ganache.
Method 2: Microwave (Quick and Easy)
A fast and effective method if you’re careful.
Instructions:
- Place chopped chocolate in a microwave-safe bowl.
- Microwave at 50% power for 30 seconds.
- Stir well (even if it doesn’t look melted).
- Continue microwaving in 15-second intervals, stirring between each.
- Stop when only a few lumps remain — stir to finish melting.
✅ Best for: Small amounts, drizzling, or quick baking needs.
Tips to Avoid Common Chocolate Melting Mistakes
❌ Don’t Overheat
Always use low heat and stir constantly. Chocolate can burn before it even looks melted.
❌ Avoid Water Contact
Make sure all utensils and bowls are 100% dry. Even a single drop of water can cause the chocolate to seize.
If it seizes, you can try to fix it by adding a teaspoon of neutral oil or warm milk and stirring vigorously.
❌ Don’t Use Plastic Bowls on the Stove
Only use heatproof glass or metal bowls for the double boiler method.
✅ Chop the Chocolate Evenly
Smaller, uniform pieces melt more evenly and quickly.
Bonus Tip: Tempering Chocolate (Optional for Shine and Snap)
If you’re dipping fruits, cookies, or making chocolate decorations, you may want to temper your chocolate. This process gives it a beautiful glossy finish and that satisfying snap when it sets.
Tempering involves precise heating and cooling — but for general melting and baking, you don’t need to worry about this step.
Flavor and Use Ideas for Melted Chocolate
Once melted, chocolate becomes the foundation for dozens of desserts. Here are just a few ideas:
- Dip strawberries or marshmallows
- Drizzle over cakes, cookies, or pancakes
- Mix into batters for cakes and brownies
- Stir into warm milk for hot chocolate
- Layer in parfaits or trifles
- Use as a glaze or filling
Smooth, Glossy, and Ready to Go
Melting chocolate is one of those essential kitchen skills that seems easy — until it goes wrong. But with the right tools, a gentle touch, and a little attention, you’ll melt chocolate like a pro every time.
Now that you know how to avoid the pitfalls and master both microwave and stovetop methods, you’re ready to create everything from silky sauces to stunning dessert garnishes — without fear of burning or clumping.