A spoonful of whipped cream can transform a good dessert into an unforgettable one. Whether topping a slice of pie, swirling over hot chocolate, or layering into a trifle, homemade whipped cream is a simple but powerful finishing touch — and it’s much better than store-bought.
In this guide, you’ll learn how to make classic whipped cream from scratch, explore variations, troubleshoot common mistakes, and discover fun ways to use and flavor it.
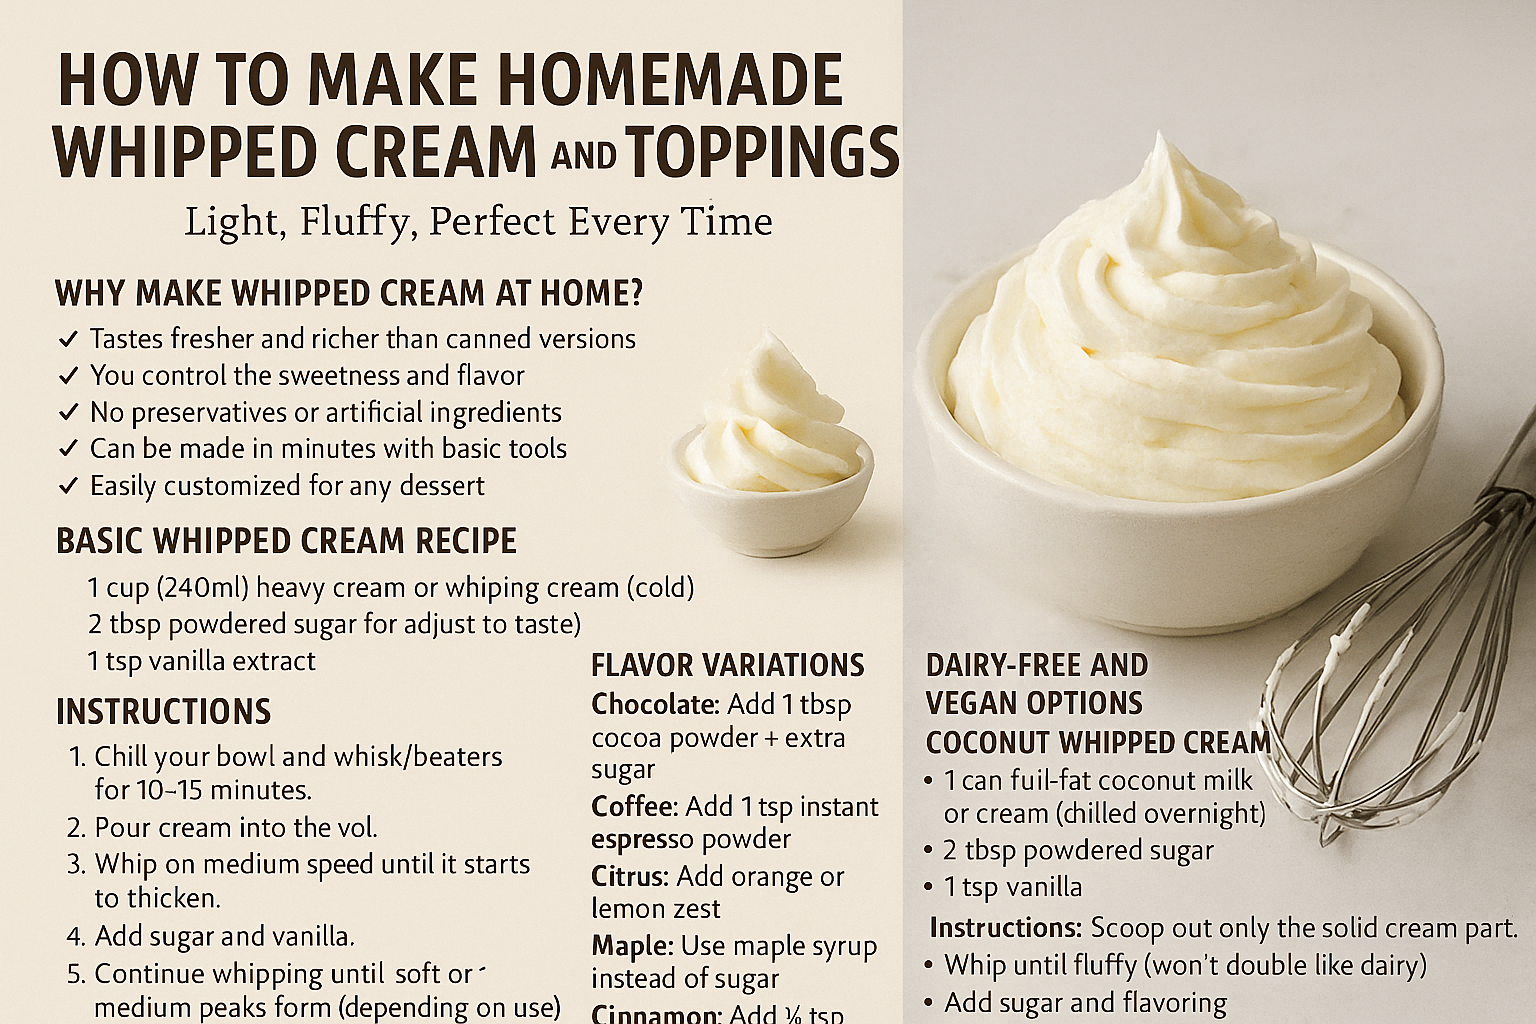
Why Make Whipped Cream at Home?
- Tastes fresher and richer than canned versions
- You control the sweetness and flavor
- No preservatives or artificial ingredients
- Can be made in minutes with basic tools
- Easily customized for any dessert
🥄 Just 3 ingredients — but endless ways to elevate your sweets.
Basic Whipped Cream Recipe
Ingredients:
- 1 cup (240ml) heavy cream or whipping cream (cold)
- 2 tbsp powdered sugar (or adjust to taste)
- 1 tsp vanilla extract
Instructions:
- Chill your bowl and whisk/beaters for 10–15 minutes.
- Pour cream into the bowl.
- Whip on medium speed until it starts to thicken.
- Add sugar and vanilla.
- Continue whipping until soft or medium peaks form (depending on use).
Peak Stages Explained
- Soft peaks: Gently mounding, slightly droopy — best for folding into desserts
- Medium peaks: Holds shape but still soft — ideal for topping pies and cakes
- Stiff peaks: Very firm, but don’t overbeat — great for piping or layering
⚠️ Overwhipping turns cream into butter — stop as soon as peaks hold their shape.
Flavor Variations
Give your whipped cream some personality:
- Chocolate: Add 1 tbsp cocoa powder + extra sugar
- Coffee: Add 1 tsp instant espresso powder
- Citrus: Add orange or lemon zest
- Maple: Use maple syrup instead of sugar
- Cinnamon: Add ½ tsp ground cinnamon
- Boozy: Add 1 tbsp of rum, Baileys, Kahlua, or amaretto (for adults)
Dairy-Free and Vegan Options
Coconut Whipped Cream
Ingredients:
- 1 can full-fat coconut milk or cream (chilled overnight)
- 2 tbsp powdered sugar
- 1 tsp vanilla
Instructions:
- Scoop out only the solid cream part.
- Whip until fluffy (won’t double like dairy).
- Add sugar and flavoring.
🌱 Great for vegan or lactose-free desserts!
How to Stabilize Whipped Cream (Lasts Longer)
Stabilized whipped cream holds its shape longer — great for piping or hot weather.
Add one of the following:
- 1 tbsp powdered milk
- 1 tsp cornstarch
- 1 tsp unflavored gelatin (dissolved in water)
- 2 tbsp instant pudding mix (vanilla works best)
🧁 Perfect for layered cakes, cupcakes, or desserts sitting out at parties.
Fun Ways to Use Whipped Cream
- Top pies, cobblers, crisps, or brownies
- Layer in trifles or parfaits
- Fill cupcakes or donuts
- Add to iced coffee or hot cocoa
- Spoon onto fruit salad or roasted fruits
- Dollop onto pancakes or waffles
- Serve with scones and jam for afternoon tea
Piping Whipped Cream for Decoration
Tools:
- Piping bag
- Star or round tips
- Chilled whipped cream (medium-stiff peaks)
Tips:
- Practice on a plate before decorating
- Pipe small swirls, rosettes, or borders
- Add sprinkles, cocoa, or shaved chocolate
How to Store Whipped Cream
- Store in airtight container in the fridge
- Use within 24–48 hours for best texture
- Re-whip briefly if it starts to deflate
- Don’t freeze whipped cream unless already piped or stabilized
✅ Pipe onto baking paper and freeze small shapes for quick decorating later.
Final Thought: Light, Sweet, and Made by You
Homemade whipped cream is one of the easiest ways to add a touch of luxury to your desserts. It’s fast, affordable, and completely customizable — and once you’ve made it yourself, there’s no going back.
So keep that cream cold, grab your whisk, and let your desserts rise to new heights of fluffy, flavorful perfection.